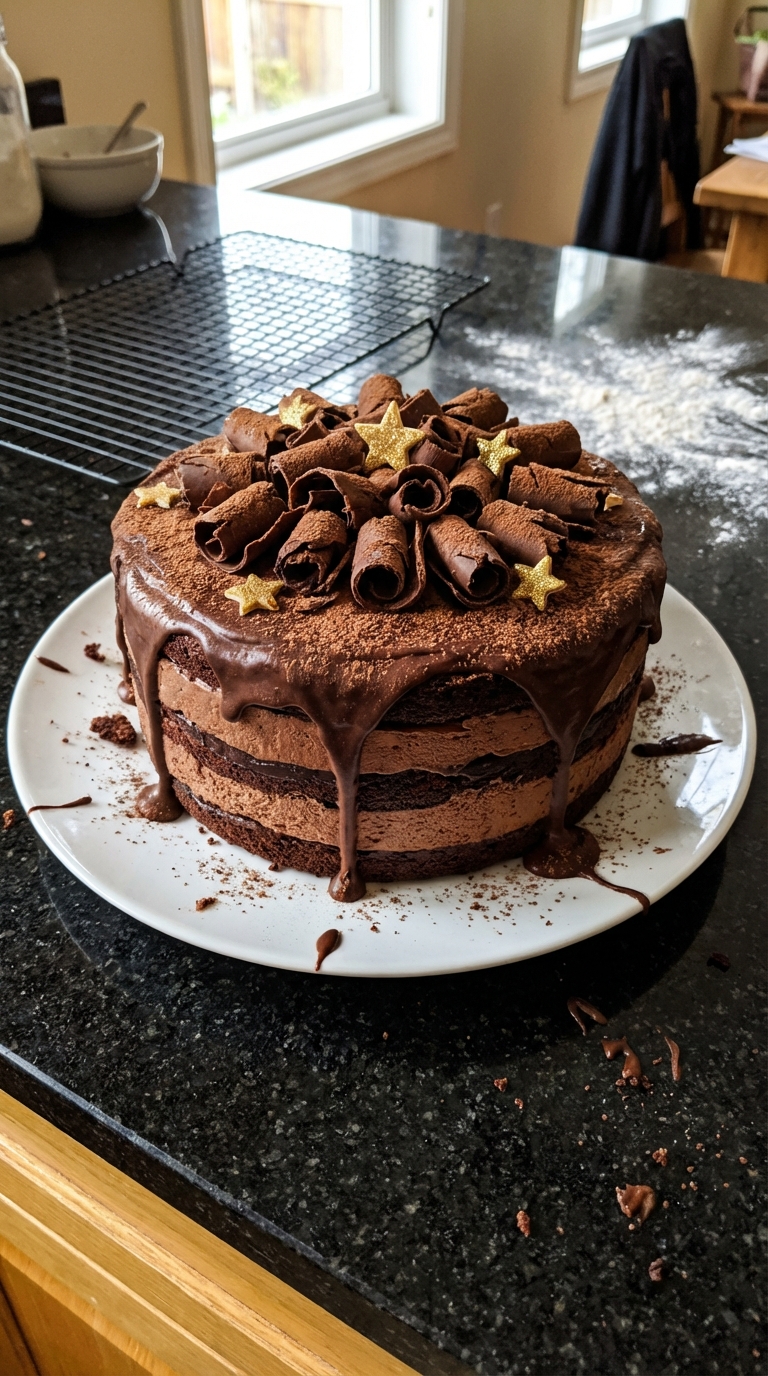
Chocolate Pisces Dream Cake
Highlighted under: Baking & Desserts
I absolutely love creating desserts that not only taste divine but also captivate the senses. The Chocolate Pisces Dream Cake is a perfect example, combining rich, moist chocolate layers with a dreamy, creamy filling. As I perfected this cake, I found that the secret lies in fully incorporating the butter and sugar until fluffy, which creates a light texture that contrasts beautifully with the dense chocolate. This cake is perfect for celebrations or simply indulging on a cozy evening at home.
When I first crafted the Chocolate Pisces Dream Cake, my goal was to blend the deep flavors of chocolate with an unexpected twist. After several trials, I discovered that adding a hint of coffee in the batter elevates the chocolate flavor to another level. It's a subtle addition that truly makes the cake sing!
The cake layers are rich but not overwhelming, especially when paired with the smooth filling. I recommend letting the cake sit for a day before serving; this allows the flavors to mingle beautifully. Trust me, it’s worth the wait!
Why You'll Love This Recipe
- Rich chocolate flavor paired with fresh orange zest
- Creamy texture that melts in your mouth
- Perfect for celebrations or as a sweet indulgence
Mastering the Cake Texture
The texture of the Chocolate Pisces Dream Cake is a pivotal aspect of its overall appeal. To achieve a rich yet airy cake, it’s crucial to cream the butter and sugar until light and fluffy before adding in your wet ingredients. This process usually takes about 3-5 minutes on medium speed and introduces air into the batter, resulting in a cake that rises beautifully and remains moist.
A common mistake is undermixing or overmixing the batter after adding the boiling water. The goal is to combine the wet and dry ingredients smoothly without losing the air you've incorporated earlier. The batter should be smooth and glossy, indicating that the ingredients are well-blended. If the batter appears too thick, don't hesitate to add an extra splash of boiling water to achieve a smoother consistency.
The Creamy Filling
The filling is essential in balancing the cake's rich chocolate layers. When whipping the heavy cream, monitor it closely until soft peaks form; this is when the cream holds its shape but isn’t yet too stiff. If overwhipped, the cream can become grainy, which will affect the smoothness of the filling. Aim for peaks that gently fold over without losing their volume.
Combining the whipped cream with the cream cheese mixture requires a gentle touch. Fold the two together, being careful not to deflate the cream. This airy filling will elevate the cake’s texture, making it incredibly light and enticing. If you want to introduce a flavor twist, consider adding citrus zest, like orange, to complement the chocolate.
Storing and Serving
This cake is best served fresh but can be stored in the refrigerator for up to three days. Make sure it's covered to maintain its moisture. If you want to prepare it ahead of time, you can bake the cake layers a day in advance. Once cooled, wrap them tightly in plastic wrap and store them at room temperature. Assemble them with the filling just before serving for the freshest taste.
In terms of serving, this cake shines best when it's at room temperature. For an added touch, you can dust the top with cocoa powder or drizzle a bit of melted chocolate. Consider pairing it with a scoop of vanilla ice cream or a dollop of extra whipped cream for an indulgent dessert experience that feels special.
Ingredients
Gather these ingredients to create your Chocolate Pisces Dream Cake:
For the Cake:
- 1 3/4 cups all-purpose flour
- 1 1/2 cups granulated sugar
- 3/4 cup unsweetened cocoa powder
- 1 1/2 tsp baking powder
- 1 1/2 tsp baking soda
- 1 tsp salt
- 2 large eggs
- 1 cup whole milk
- 1/2 cup vegetable oil
- 2 tsp vanilla extract
- 1 cup boiling water
For the Filling:
- 1 cup heavy cream
- 8 oz cream cheese, softened
- 1/2 cup powdered sugar
- 1 tsp vanilla extract
Make sure to have all the ingredients ready before you start baking!
Instructions
Follow these steps to bake your Chocolate Pisces Dream Cake:
Preheat the Oven
Preheat your oven to 350°F (175°C) and prepare two 9-inch round cake pans by greasing and lining them with parchment paper.
Mix Dry Ingredients
In a large bowl, sift together the flour, sugar, cocoa powder, baking powder, baking soda, and salt.
Add Wet Ingredients
Add eggs, milk, oil, and vanilla extract to the dry mixture. Mix on medium speed until well combined, then stir in the boiling water until smooth.
Bake the Cakes
Divide the batter evenly between the prepared pans and bake for 30-35 minutes. A toothpick inserted should come out clean.
Prepare the Filling
Whip the heavy cream until soft peaks form. In another bowl, beat the cream cheese, powdered sugar, and vanilla until smooth. Fold in the whipped cream gently.
Assemble the Cake
Once the cakes are cool, place one layer on a serving plate, spread the filling generously on top, and add the second layer. Decorate as desired.
Enjoy every satisfying bite of your creation!
Pro Tips
- For an extra touch, drizzle melted chocolate or caramel over the top before serving!
Ingredient Substitutions
If you're looking to make a dairy-free version of the Chocolate Pisces Dream Cake, consider using almond milk or oat milk in place of whole milk. For the cream filling, a plant-based cream cheese can serve as a suitable substitute, along with coconut cream for the whipped topping. This helps create a similar creamy texture while accommodating dietary preferences.
For those who are gluten-sensitive, substituting the all-purpose flour with a gluten-free flour blend can work well. Make sure to choose a blend that is designed to use 1:1 in recipes. This will help maintain the texture of the cake without compromising the integrity of the final product.
Scaling Your Recipe
If you're planning a larger gathering, this recipe can easily be scaled up to accommodate more servings. To make a large sheet cake, simply multiply the ingredients by 1.5 or 2, depending on the desired size. Just be sure to adjust the baking times, as larger or deeper cakes may require an additional 5-10 minutes in the oven. Always do a toothpick test to confirm doneness.
Alternatively, you can create individual mini cakes by using a muffin tin. Just pour the batter into each cup and reduce the baking time to around 20-25 minutes. Mini cakes not only look charming but also make for easy serving at parties.
Questions About Recipes
→ Can I make this cake ahead of time?
Yes, you can bake the cakes a day in advance and assemble them the following day.
→ How should I store the cake?
Store the cake in an airtight container in the refrigerator for up to 5 days.
→ Can I use a different filling?
Absolutely! You can substitute with flavored whipped cream or a fruit puree for a lighter taste.
→ Is this cake suitable for freezing?
Yes, you can freeze the layers individually, tightly wrapped, for up to 2 months. Thaw before assembly.
Chocolate Pisces Dream Cake
Created by: The Cookistrylab Team
Recipe Type: Baking & Desserts
Skill Level: Intermediate
Final Quantity: 8 servings
What You'll Need
For the Cake:
- 1 3/4 cups all-purpose flour
- 1 1/2 cups granulated sugar
- 3/4 cup unsweetened cocoa powder
- 1 1/2 tsp baking powder
- 1 1/2 tsp baking soda
- 1 tsp salt
- 2 large eggs
- 1 cup whole milk
- 1/2 cup vegetable oil
- 2 tsp vanilla extract
- 1 cup boiling water
For the Filling:
- 1 cup heavy cream
- 8 oz cream cheese, softened
- 1/2 cup powdered sugar
- 1 tsp vanilla extract
How-To Steps
Preheat your oven to 350°F (175°C) and prepare two 9-inch round cake pans by greasing and lining them with parchment paper.
In a large bowl, sift together the flour, sugar, cocoa powder, baking powder, baking soda, and salt.
Add eggs, milk, oil, and vanilla extract to the dry mixture. Mix on medium speed until well combined, then stir in the boiling water until smooth.
Divide the batter evenly between the prepared pans and bake for 30-35 minutes. A toothpick inserted should come out clean.
Whip the heavy cream until soft peaks form. In another bowl, beat the cream cheese, powdered sugar, and vanilla until smooth. Fold in the whipped cream gently.
Once the cakes are cool, place one layer on a serving plate, spread the filling generously on top, and add the second layer. Decorate as desired.
Extra Tips
- For an extra touch, drizzle melted chocolate or caramel over the top before serving!
Nutritional Breakdown (Per Serving)
- Calories: 380 kcal
- Total Fat: 26g
- Saturated Fat: 15g
- Cholesterol: 195mg
- Sodium: 85mg
- Total Carbohydrates: 32g
- Dietary Fiber: 3g
- Sugars: 24g
- Protein: 6g