Luscious Reese's Ice Cream Cake
Highlighted under: Baking & Desserts
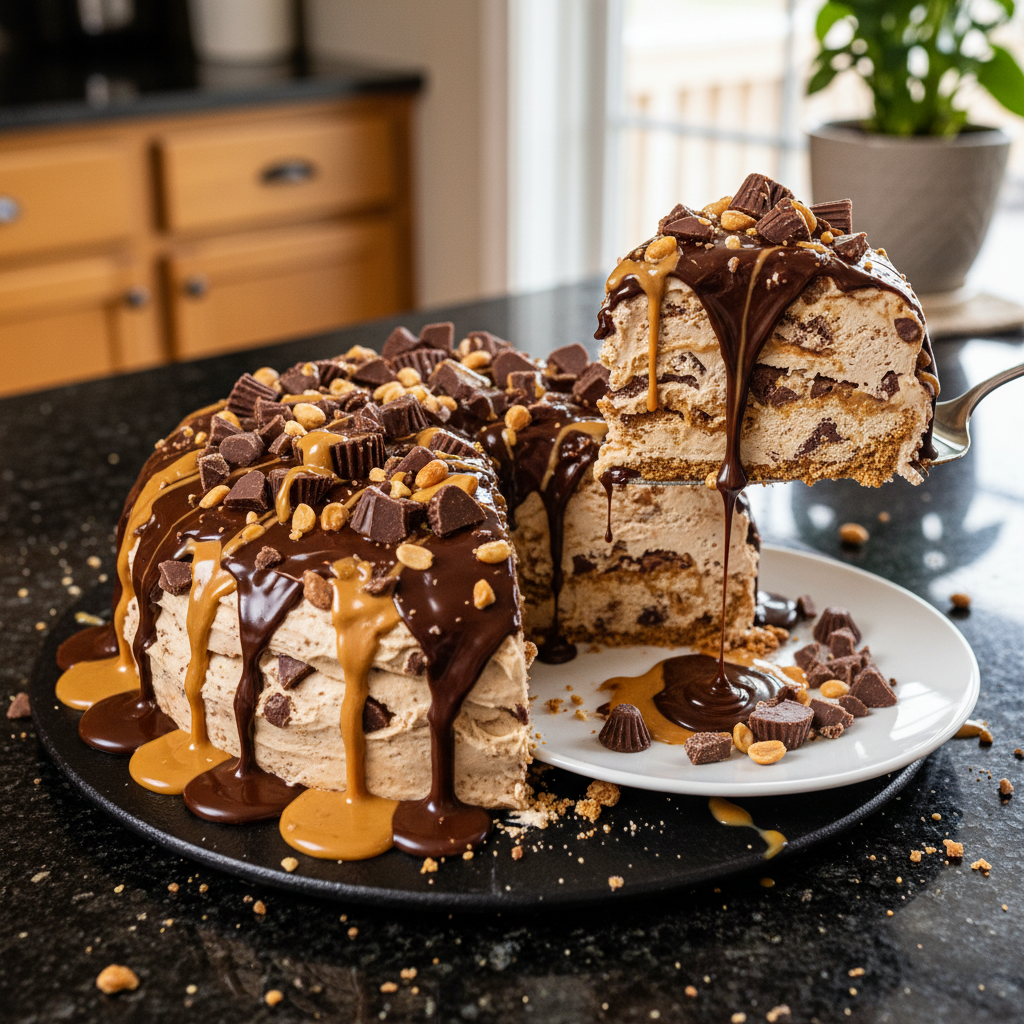
I absolutely love making desserts that leave friends and family craving more, and this Luscious Reese's Ice Cream Cake is no exception. With layers of rich chocolate ice cream, creamy peanut butter, and crunchy Reese's pieces, it's a heavenly treat that’s perfect for any occasion. Every bite is a magical combination of flavors that feels like a celebration. Whether it's for a birthday, holiday, or just a hot summer day, this cake is sure to impress everyone and keep them coming back for seconds.
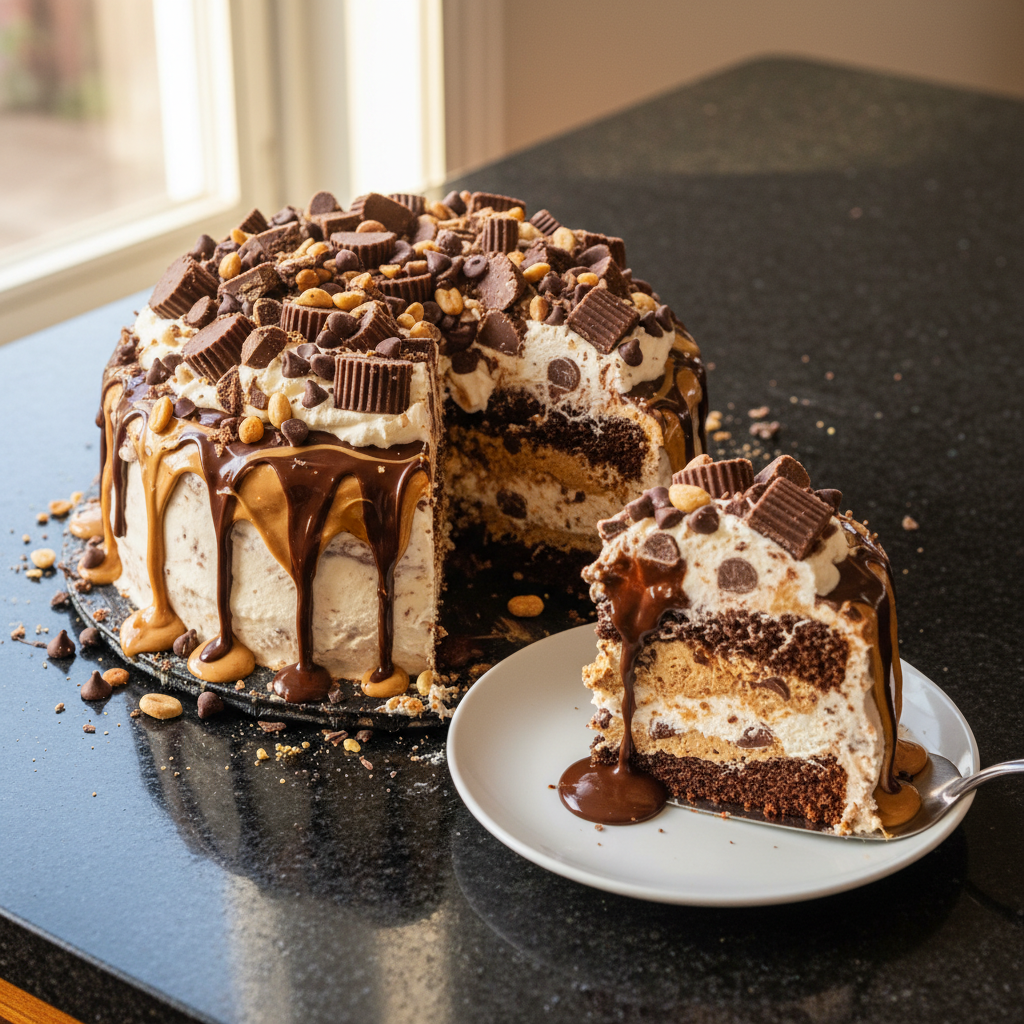
When I first made this Luscious Reese's Ice Cream Cake, I was amazed at how seamlessly the flavors blended together. The key is letting the cake freeze properly; it needs at least four hours to ensure that it holds its shape and each layer remains distinct. Using a mix of creamy peanut butter and crunchy Reese's pieces really enhances the experience, making each bite a delight to the senses.
I also discovered that drizzling hot fudge over the top just before serving elevates this dessert to a whole new level. The warm fudge against the cold ice cream is a texture combination that my guests can never resist. I can't wait for you to try this recipe and enjoy it as much as I do!
Why You'll Love This Recipe
- Decadent chocolate ice cream paired with creamy peanut butter flavor.
- Rich texture complemented by crunchy bits of Reese's pieces.
- Impressive visually and deliciously, perfect for gatherings or special occasions.
Perfecting Your Cake Layer
When making your chocolate cake layer, follow the instructions carefully to ensure a moist and rich texture. If you opt for a homemade cake, consider using a recipe that includes buttermilk for extra richness. Also, make sure to let the cake cool completely before layering the ice cream; this will prevent the ice cream from melting and creating a messy cake.
Using a springform pan can simplify the removal of your ice cream cake. Line the bottom with parchment paper and lightly grease the sides. This will help the cake come out smoothly when it’s time to serve, maintaining its layered structure.
Ice Cream Layering Techniques
To achieve a smooth ice cream layer, soften the chocolate ice cream just enough to spread easily, but not so much that it melts into a liquid. About 10-15 minutes at room temperature should suffice. When spreading, use an offset spatula for effortlessly creating an even surface that looks professionally done.
After adding the peanut butter and Reese's mixture, make sure it’s spread evenly to ensure every slice has that perfect balance of textures and flavors. If you find the peanut butter mixture too thick to spread, briefly warm it in the microwave for about 15 seconds to make it more manageable.
Ingredients
Gather the following ingredients to create this indulgent dessert:
Ingredients
- 1 ½ quarts chocolate ice cream, softened
- 1 cup creamy peanut butter
- 1 cup Reese's pieces, chopped
- 1 cup hot fudge sauce
- 1 chocolate cake layer (store-bought or homemade)
- 2 cups whipped cream for topping
Make sure all ingredients are at room temperature for better mixing.
Instructions
Follow these easy steps to create your ice cream cake:
Prepare the Cake Layer
Start by baking the chocolate cake according to package instructions, or use a store-bought layer. Let it cool completely before assembling the ice cream cake.
Layer the Ice Cream
Spread softened chocolate ice cream evenly over the cooled cake layer, making sure to create an even surface.
Add Peanut Butter and Reese's
In a bowl, mix peanut butter and half of the chopped Reese's pieces. Spread this mixture on top of the chocolate ice cream layer.
Freeze
Cover the cake with plastic wrap and freeze for at least 4 hours, or until firm.
Top with Hot Fudge and Whipped Cream
Before serving, drizzle hot fudge over the top and add whipped cream. Sprinkle the remaining chopped Reese's pieces for garnish.
Ensure each layer is well-packed for a stable cake.
Pro Tips
- Allow the cake to sit at room temperature for about 10 minutes before slicing for easier serving.
Flavor Enhancements
If you want to add extra depth to your Luscious Reese's Ice Cream Cake, consider incorporating a layer of crushed graham crackers or chocolate wafer cookies between the cake and ice cream layer. This adds a delightful crunch and enhances the overall texture of the dessert.
For a more intense peanut butter flavor, try blending in a touch of powdered sugar into the peanut butter before spreading it onto the ice cream. This not only sweetens the layer slightly but also prevents it from overwhelming the other flavors.
Storage and Serving Tips
Store the assembled ice cream cake in the freezer for up to one week. If you need to make it in advance, prepare and freeze the cake, then add the whipped cream and hot fudge just before serving to maintain their freshness and appearance. Cover the top with plastic wrap for optimal freshness.
When ready to serve, use a hot knife (run under hot water and dried) to slice through the layers effortlessly. This ensures a clean cut, revealing the luscious layers, which is crucial for visual appeal, especially when serving guests at a gathering.
Questions About Recipes
→ Can I use different ice cream flavors?
Absolutely! Feel free to experiment with your favorite ice cream flavors.
→ How long can I store leftovers?
This cake can be stored in the freezer for up to a week, though it's best enjoyed fresh.
→ Is there a dairy-free option?
Yes, you can use dairy-free ice cream and a vegan chocolate cake for a dairy-free version.
→ What can I use instead of hot fudge sauce?
You can substitute with chocolate syrup or caramel sauce if you prefer.
Luscious Reese's Ice Cream Cake
Created by: The Cookistrylab Team
Recipe Type: Baking & Desserts
Skill Level: Intermediate
Final Quantity: 8 servings
What You'll Need
Ingredients
- 1 ½ quarts chocolate ice cream, softened
- 1 cup creamy peanut butter
- 1 cup Reese's pieces, chopped
- 1 cup hot fudge sauce
- 1 chocolate cake layer (store-bought or homemade)
- 2 cups whipped cream for topping
How-To Steps
Start by baking the chocolate cake according to package instructions, or use a store-bought layer. Let it cool completely before assembling the ice cream cake.
Spread softened chocolate ice cream evenly over the cooled cake layer, making sure to create an even surface.
In a bowl, mix peanut butter and half of the chopped Reese's pieces. Spread this mixture on top of the chocolate ice cream layer.
Cover the cake with plastic wrap and freeze for at least 4 hours, or until firm.
Before serving, drizzle hot fudge over the top and add whipped cream. Sprinkle the remaining chopped Reese's pieces for garnish.
Extra Tips
- Allow the cake to sit at room temperature for about 10 minutes before slicing for easier serving.
Nutritional Breakdown (Per Serving)
- Calories: 380 kcal
- Total Fat: 26g
- Saturated Fat: 15g
- Cholesterol: 195mg
- Sodium: 85mg
- Total Carbohydrates: 32g
- Dietary Fiber: 3g
- Sugars: 24g
- Protein: 6g