Heart-Shaped Vanilla Cake Pops
Highlighted under: Baking & Desserts
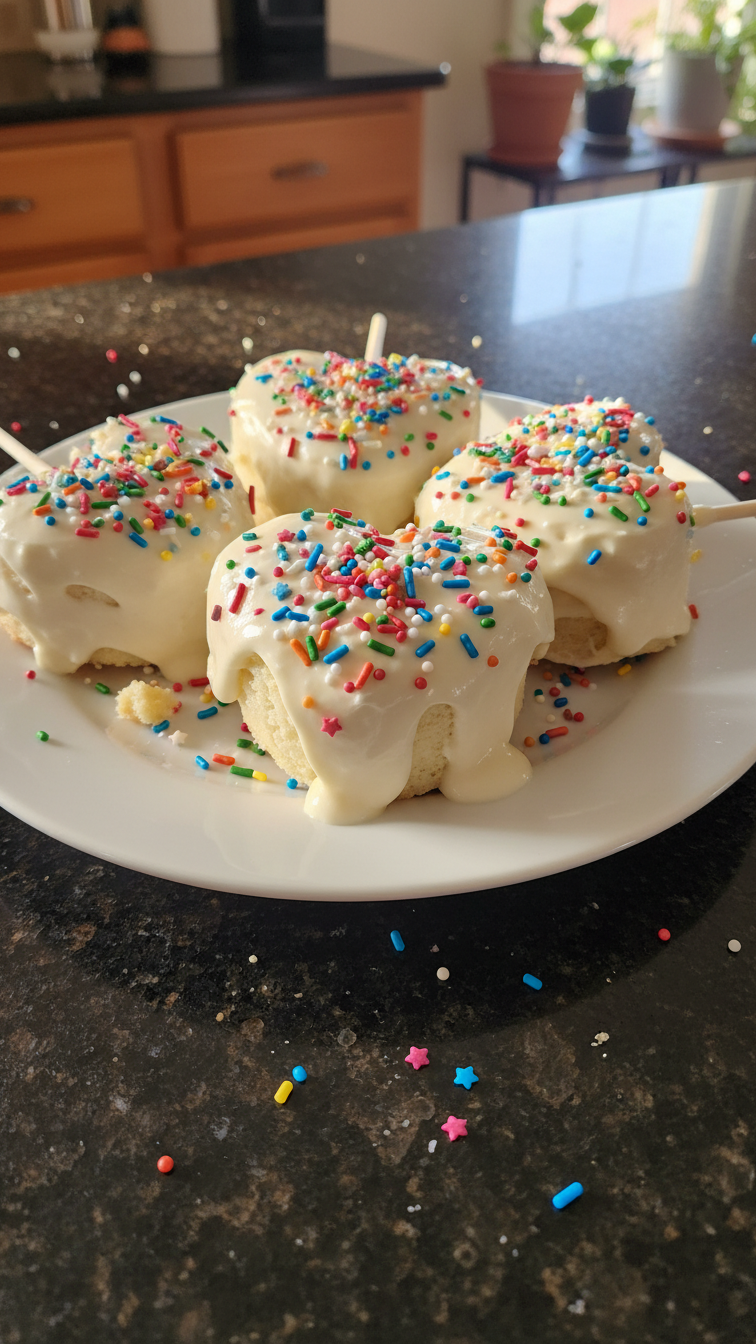
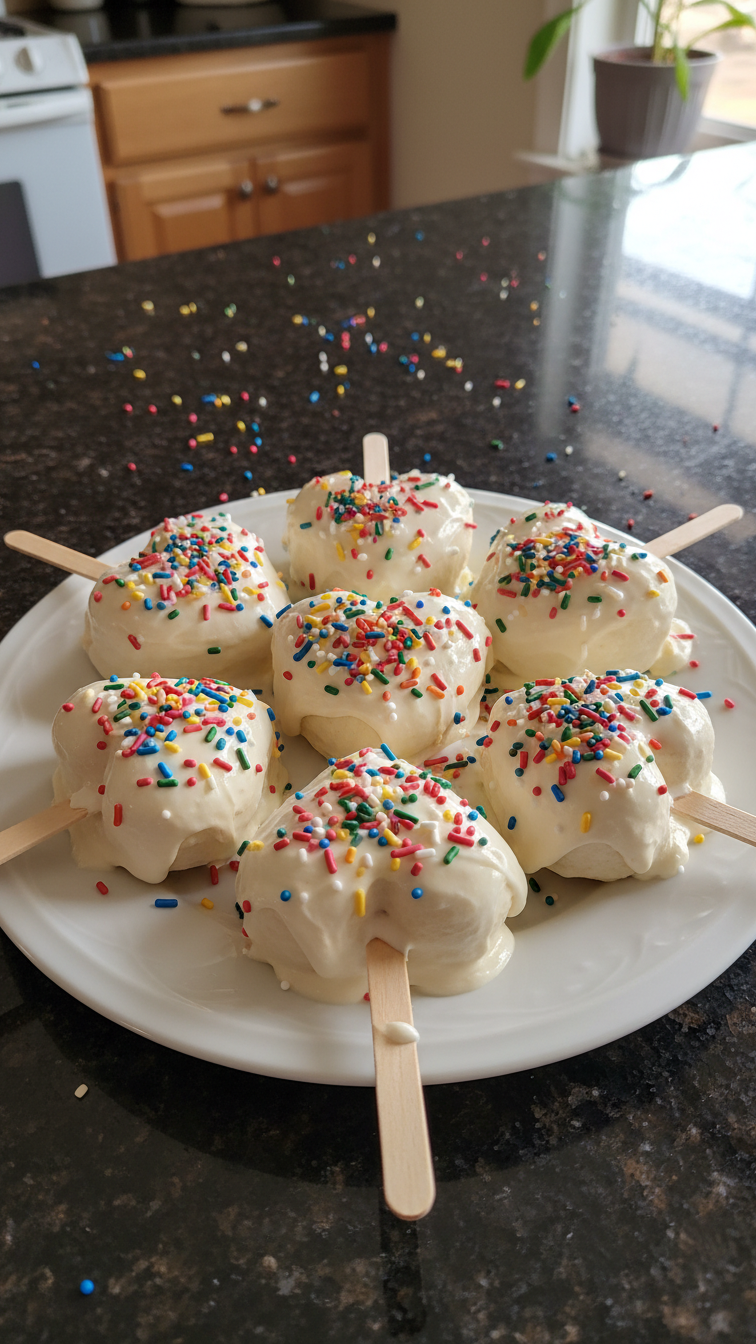
I absolutely adore making these heart-shaped vanilla cake pops, especially for special occasions. They are not only adorable but also incredibly fun to make with friends or family. The fluffy vanilla cake pairs perfectly with creamy white chocolate coating, making each bite a delightful treat. Plus, decorating them with colorful sprinkles adds a personal touch that makes them even more festive. Whether it's a birthday, anniversary, or just a sweet surprise for someone you love, these cake pops are sure to bring smiles all around!
Making these heart-shaped vanilla cake pops was a delightful experience. I started with a simple vanilla cake recipe, ensuring to bake it until golden and fluffy. To achieve the perfect texture, I let the cake cool completely before crumbling it. This method guarantees a greater ability to mold the pops without crumbling apart later. It was so satisfying to watch them turn into little hearts!
I also learned that using candy melts for coating helps achieve a smooth finish and bright colors. After dipping each pop, I let them set on a styrofoam block, which is a great hack to avoid messy drips. Each pop was decorated with a variety of sprinkles, making them a colorful crowd-pleaser.
Why You'll Love These Cake Pops
- Charming heart shape that's perfect for celebrations
- Fluffy vanilla cake with a rich chocolate coating
- Endless decorating possibilities to personalize your treats
Creating Heart Shapes
To achieve perfect heart shapes, make sure your cake is well-ground before mixing it with frosting or melted chocolate. This ensures that the mixture will hold together properly when shaped. If it's too crumbly, add more frosting gradually until it becomes moldable. On the other hand, if the mixture is too sticky, you can chill it briefly to make handling easier. When forming the hearts, use your hands to gently press and shape them to avoid cracks and ensure they hold their form.
It's also essential to insert the lollipop sticks firmly into the heart shapes but not so deep that they poke out of the other side. A good rule of thumb is to insert the stick about halfway into each cake pop. After shaping, placing them in the refrigerator for 20 minutes helps strengthen their structure, making them less likely to fall apart during coating.
Mastering the Coating
When melting the white chocolate, be cautious not to overheat it, as this can lead to clumping or a burned chocolate. Use a microwave in 30-second intervals, stirring in between, until the chocolate is glossy and completely melted. Alternatively, a double boiler method works well, ensuring gentle heat transfer. Also, consider adding a teaspoon of vegetable oil to the melted chocolate to give it a smoother consistency that makes dipping easier.
As you dip each cake pop into the white chocolate, give it a little twist to ensure it's evenly coated. Allow any excess chocolate to drip off, as a thick coating can make the cake pops top-heavy, causing them to topple over. Quickly sprinkle your decorations while the chocolate is still wet to ensure they adhere properly.
Decorating and Storage Tips
The decorating stage is where you can really personalize your cake pops. Besides sprinkles, consider using edible glitter, chocolate drizzle, or even small edible flowers for a more elegant touch. You can also experiment with different colors of melts to match special occasions or your party theme. Simply melt additional colors and drizzle them over the coated pops for a beautiful effect.
If you're not serving the cake pops immediately, store them in an airtight container in the refrigerator. They can last up to a week. However, for longer storage, freeze them on a baking sheet until firm, then place them in a freezer-safe bag. Just remember to let them thaw in the fridge before serving to maintain their texture and taste.
Ingredients
Gather the following ingredients to make your heart-shaped vanilla cake pops:
For the Cake:
- 2 cups all-purpose flour
- 1 cup granulated sugar
- 1/2 cup unsalted butter, softened
- 1 cup milk
- 3 large eggs
- 2 teaspoons baking powder
- 1 teaspoon vanilla extract
- 1/4 teaspoon salt
For the Coating:
- 1 cup white chocolate melts
- Sprinkles or other decorations
Once you have all the ingredients, you're ready to start making these delightful cake pops!
Instructions
Follow these simple steps to create your heart-shaped vanilla cake pops:
Bake the Cake
Preheat your oven to 350°F (175°C). In a large bowl, cream together the softened butter and sugar until light and fluffy. Add the eggs one at a time, mixing well after each addition. Stir in the milk and vanilla extract. In a separate bowl, whisk together the flour, baking powder, and salt. Gradually add the dry ingredients to the wet mixture, mixing until just combined. Pour the batter into a greased heart-shaped cake pan and bake for about 15 minutes, or until a toothpick comes out clean. Let it cool completely.
Prepare the Cake Pops
Once the cake has cooled, crumble it into a large bowl. Using your hands, mix the crumbled cake with a few tablespoons of frosting or melted chocolate until it holds together when pressed. Form the mixture into heart shapes and place them on a baking sheet lined with parchment paper. Insert lollipop sticks into each heart shape and refrigerate for about 20 minutes until firm.
Coat the Cake Pops
Melt the white chocolate melts according to package instructions. Dip each chilled cake pop into the melted chocolate, allowing any excess to drip off. Quickly decorate with sprinkles before the chocolate hardens. Place the decorated pops upright in a styrofoam block or a tall glass to set completely.
Enjoy your delicious heart-shaped cake pops!
Pro Tips
- Try mixing different flavorings or colorings into your chocolate coating for a unique twist. You can also use silicone molds for a more defined shape if you prefer.
Ingredient Insights
The use of all-purpose flour in this cake pop recipe provides a great structure, and when combined with the baking powder, it gives the cake a delightful fluffiness. If you're looking for a gluten-free alternative, consider substituting with a gluten-free flour blend; just ensure it has a binding agent like xanthan gum to retain moisture and chewiness.
Using whole milk instead of a lower-fat option enriches the batter with creaminess, which contributes to the overall moistness of the cake pops. You could substitute for a non-dairy milk like almond or oat milk, bearing in mind that flavors may subtly change. The richness of the butter also plays a critical role in the taste and texture, so don't skip this ingredient.
Troubleshooting Tips
If your cake pops are falling apart when you dip them, it could be a sign that the cake mixture is either too dry or too wet. For a dry mixture, add a touch more melted chocolate or frosting to bind it better. Conversely, for an overly moist mixture, try chilling it longer so it firms up before shaping.
Another common issue is having the coating crack as it sets. To prevent this, ensure the cake pops are chilled adequately before dipping. If you find your chocolate coating is clumping or not setting well, double-check the melting process; overheating can ruin the texture. If it is already clumped, you might be able to salvage it by adding a bit of coconut oil or heavy cream to smooth it out.
Serving Suggestions
These heart-shaped vanilla cake pops make a charming centerpiece at any celebration. You can display them in a decorative box or a floral foam base covered with tissue or fabric for an eye-catching presentation. For events like weddings or birthdays, pairing them with complementary desserts can create a beautiful dessert table layout.
For an extra special treat, serve the cake pops alongside a dipping bar with chocolate sauces, caramel, or fruit purees. This way, guests can customize their pops with their favorite flavors, adding an interactive element to your dessert experience. It's a wonderful way to cater to various tastes and make the dessert table even more appealing.
Questions About Recipes
→ Can I make the cake pops ahead of time?
Yes, you can prepare the cake pops up to 2 days in advance. Keep them in an airtight container in the refrigerator.
→ What can I use instead of white chocolate melts?
You can use regular chocolate chips or even colored candy melts for coating.
→ How do I store leftover cake pops?
Keep leftover cake pops in an airtight container at room temperature for up to a week, or refrigerate for longer freshness.
→ Can I freeze cake pops?
Yes, you can freeze cake pops for up to a month. Wrap them individually in plastic wrap before freezing.
Heart-Shaped Vanilla Cake Pops
Created by: The Cookistrylab Team
Recipe Type: Baking & Desserts
Skill Level: Intermediate
Final Quantity: 12 cake pops
What You'll Need
For the Cake:
- 2 cups all-purpose flour
- 1 cup granulated sugar
- 1/2 cup unsalted butter, softened
- 1 cup milk
- 3 large eggs
- 2 teaspoons baking powder
- 1 teaspoon vanilla extract
- 1/4 teaspoon salt
For the Coating:
- 1 cup white chocolate melts
- Sprinkles or other decorations
How-To Steps
Preheat your oven to 350°F (175°C). In a large bowl, cream together the softened butter and sugar until light and fluffy. Add the eggs one at a time, mixing well after each addition. Stir in the milk and vanilla extract. In a separate bowl, whisk together the flour, baking powder, and salt. Gradually add the dry ingredients to the wet mixture, mixing until just combined. Pour the batter into a greased heart-shaped cake pan and bake for about 15 minutes, or until a toothpick comes out clean. Let it cool completely.
Once the cake has cooled, crumble it into a large bowl. Using your hands, mix the crumbled cake with a few tablespoons of frosting or melted chocolate until it holds together when pressed. Form the mixture into heart shapes and place them on a baking sheet lined with parchment paper. Insert lollipop sticks into each heart shape and refrigerate for about 20 minutes until firm.
Melt the white chocolate melts according to package instructions. Dip each chilled cake pop into the melted chocolate, allowing any excess to drip off. Quickly decorate with sprinkles before the chocolate hardens. Place the decorated pops upright in a styrofoam block or a tall glass to set completely.
Extra Tips
- Try mixing different flavorings or colorings into your chocolate coating for a unique twist. You can also use silicone molds for a more defined shape if you prefer.
Nutritional Breakdown (Per Serving)
- Calories: 120 kcal
- Total Fat: 6g
- Saturated Fat: 3g
- Cholesterol: 50mg
- Sodium: 60mg
- Total Carbohydrates: 15g
- Dietary Fiber: 0g
- Sugars: 9g
- Protein: 2g